The ultimate guide to customising your Android smartphone: Part 1
Despite having an iPhone at my disposal, I use an Android as my daily driver. In fact, I’ve been an Android user for a long time and I’ve stuck by the operating system for one good reason – customisation. It’s no secret that Android offers far more avenues to tweak and change the looks of your device UI. With the help of a couple of apps, you can give the interface of your Android phone a complete facelift – so much so, it would feel like a completely new device. Of course, there are a lot of layers to theming your phone, so in this article, I’ll walk you through the different levels of customisation for your Android phone. In part 1 of this two-part series, I’ll be showing how what all is possible in terms of customisation with the options that come baked into your Android phone out of the box.

Customising your Android phone without any third-party apps
Android phones have come a long way and nowadays, most devices ship with a bunch of built-in customisation features. Be it an Android phone from Samsung, Xiaomi, OPPO or even OnePlus, chances are that you are already sitting on a gold-mine of themes and tastefully-designed wallpapers. So, first and foremost, I’d like you to spend some time unravelling everything available at your disposal. In essence, I will be covering some of the best theming features available to you upon first boot. If you’d like to know more about after-market customisation options, then stay tuned as I will be writing an in-depth piece talking about the same very shortly. With that out of the way, let’s take a look at what different OEMs have in store for avid themers.
Samsung
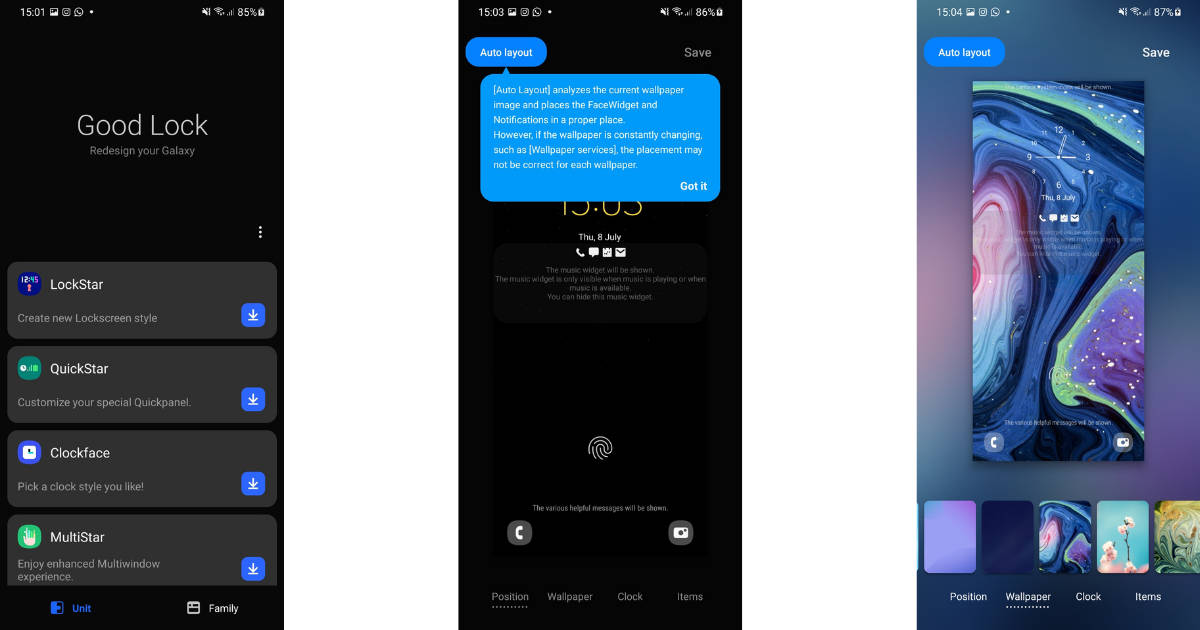
I usually default to either a Samsung or a OnePlus flagship as my daily driver, since both brands bundle a ton of nifty customisation features with their custom skins. So, if you are a Samsung user, first and foremost, head on over to the settings menu and select the display subhead. Provided your phone ships with OneUI v3.0 or higher, you will see an option to switch to a light or a dark interface front and centre.
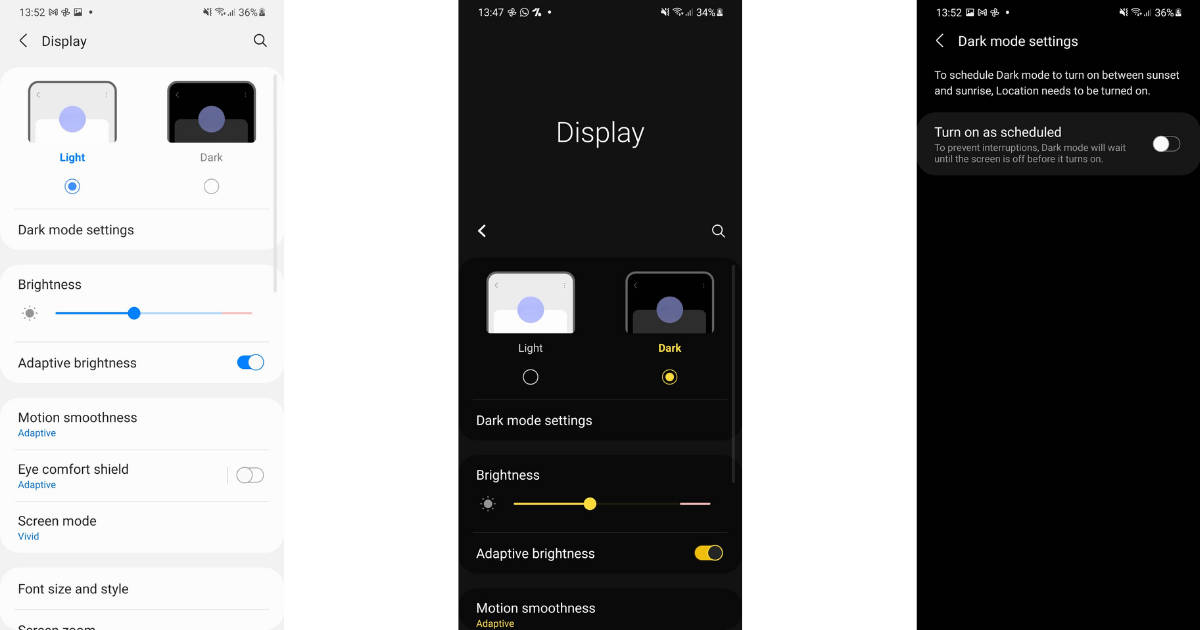
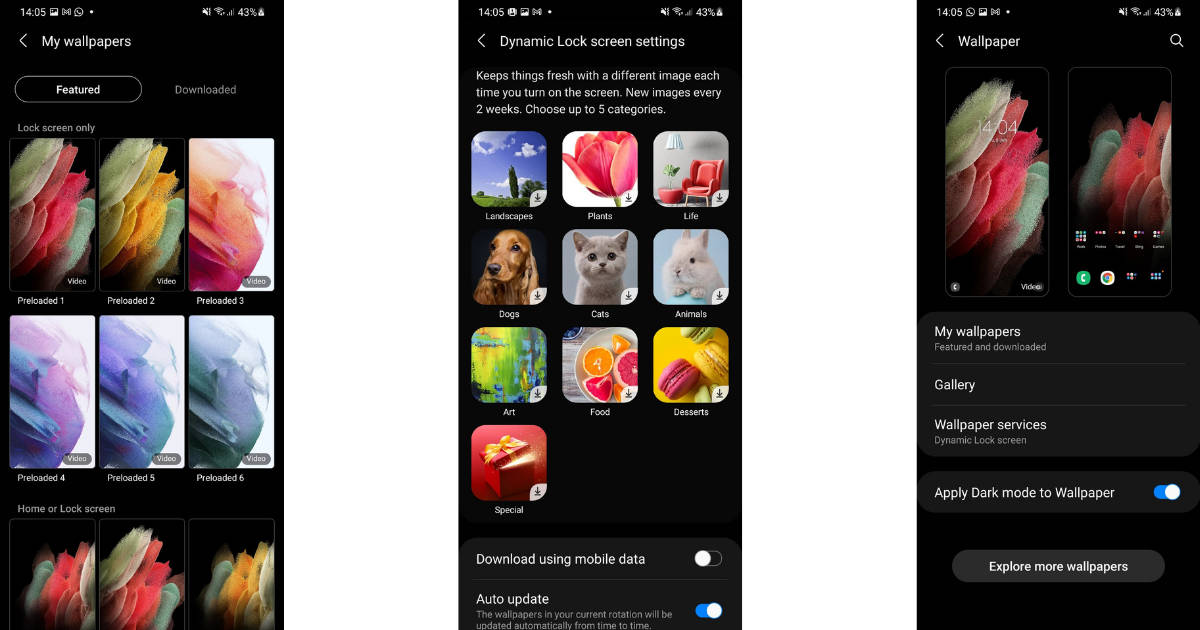
The dark mode engulfs all baked-in Samsung apps, select third-party apps and UI elements in, well, a dark theme. So, if your eyes ache from seeing OneUI’s vibrant accents, or if you just want to switch things around, sifting between a light and a dark theme will surely spruce up your viewing experience. Now that you’ve switched to a different colour scheme, it’s time to switch to a new wallpaper. You can do that by either selecting a photo from the gallery, long-pressing on the homescreen, using the wallpaper menu in the settings app or via the company’s built-in theme store. For the purpose of this article, let’s see how you can switch things around by using the wallpaper section in the settings menu.
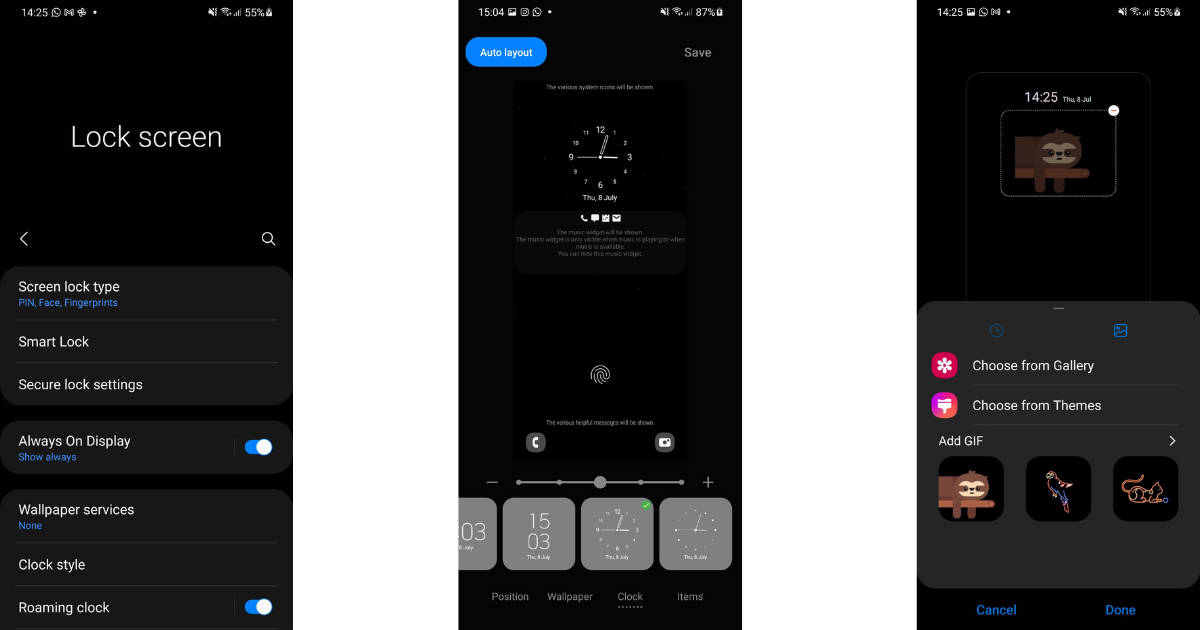
Okay, now we’re edging closer to the fun stuff. Most Samsung phones support AODs or Always on Displays and the company lets users customise them in a multitude of different ways. So, if you head on over to the lockscreen menu under the settings tab, you’ll find an option to enable AOD for your phone. Once done, you can then finetune the AOD’s appearance and select any one of the different clock styles available to you. I for one, use an animated gif of a sloth as my AOD, but you can opt for a subtler clock style with varying colour accents or choose a photo from your gallery too. And, if you don’t like the selection on hand, then you can always download more AODs from the company’s theme store.
Speaking of which, let’s talk about the company’s theme store, a utility you can access via the settings menu on most, if not all Samsung Android phones. From here, you can completely change the look of your device and revamp how different UI elements appear on your handset. Now, granted, many of the themes are paid but there are some good free ones too, including the High Contrast Theme which adds yellow accents to the notification tray, and the Simple Line icon pack which will surely add a tinge of minimalism to your otherwise cluttered home screen.
OnePlus
If you ask me, OnePlus phones offer the most elegant customisation features to boot. Now, provided your OnePlus device is running Oxygen OS v11, you can simply head on over to the settings menu and from here, choose the display tab to flip between a dark mode or a light mode. You can also increase the font size or set a screensaver from within the display tab.
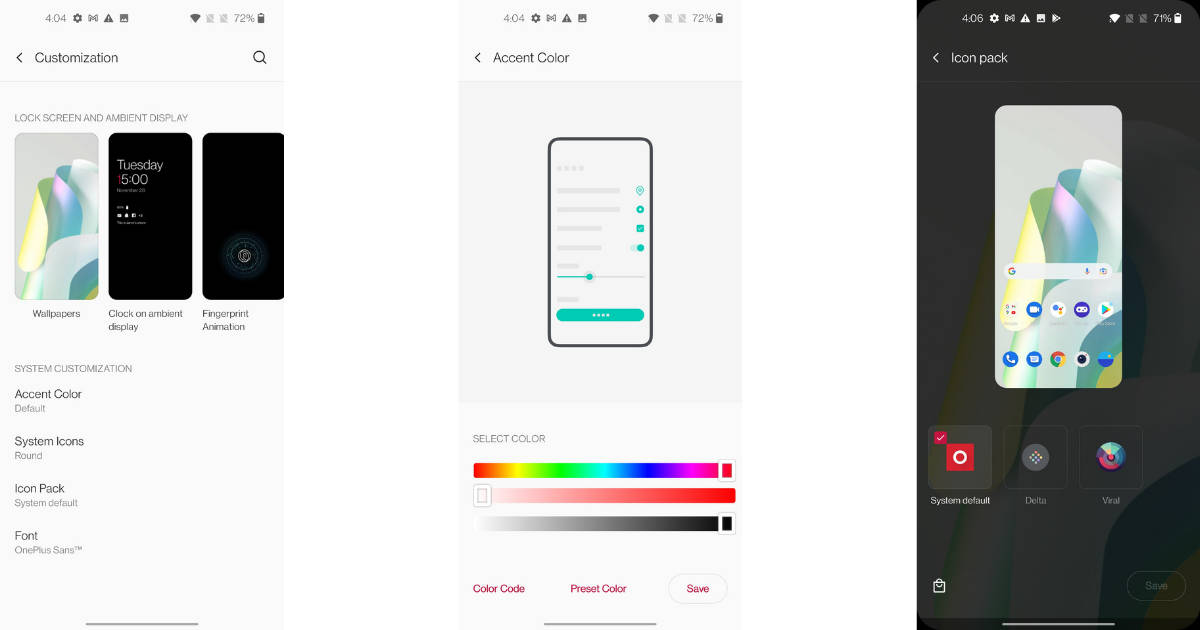
That’s not all, as the company also includes a dedicated customisation tab (found under the display subhead in settings menu) using which, you can completely transform the looks of your OnePlus device. Not only can you change the wallpaper and the clock style for your phone’s ambient display, but you can even change the animation for the in-display fingerprint sensor too. Now, unlike Samsung’s offerings, you won’t get as many options for clock faces on your OnePlus phone. However, the company does bundle some really unique AODs, the likes of which include an Insight clock face that sheds a light on your smartphone usage by calculating the number of times you’ve unlocked your phone.
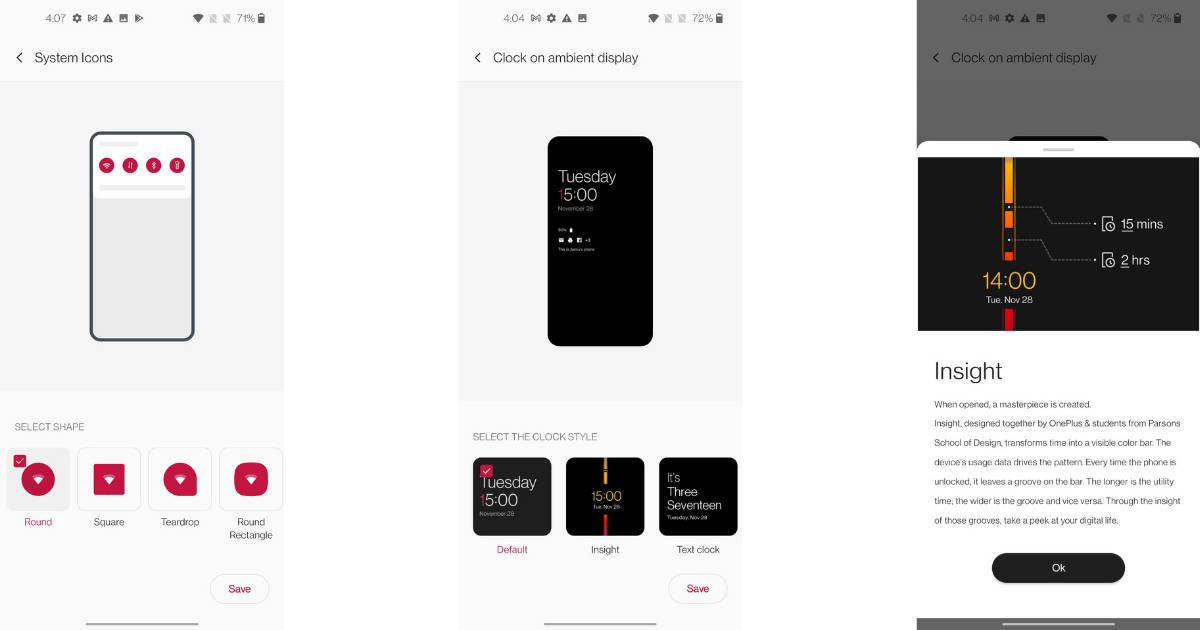
You can also change the accent colour for various UI elements (the text on the settings menu, for instance) and even choose a different shape for the quick-access shortcuts found on the notifications tray. What’s more, unlike the majority of smartphone OEMs on this list, OnePlus’ OxygenOS also lets you apply third-party icon packs. To do this, head to home settings by long-pressing an empty area on your homescreen, and scrolling down to the icon packs option. The Google Play Store has a slew of icon packs available to download, and the ones you install will show up in the home settings menu. I will have a list of some of my favourites in a follow-up article but, if you can’t contain your excitement, then do check out Viral and Delta icon packs on the Google Play store.
Xiaomi, Redmi and POCO
Xiaomi’s MIUI offers bountiful customisation features with its custom skin, so if you have a Xiaomi or a Redmi or even a POCO phone, read on.
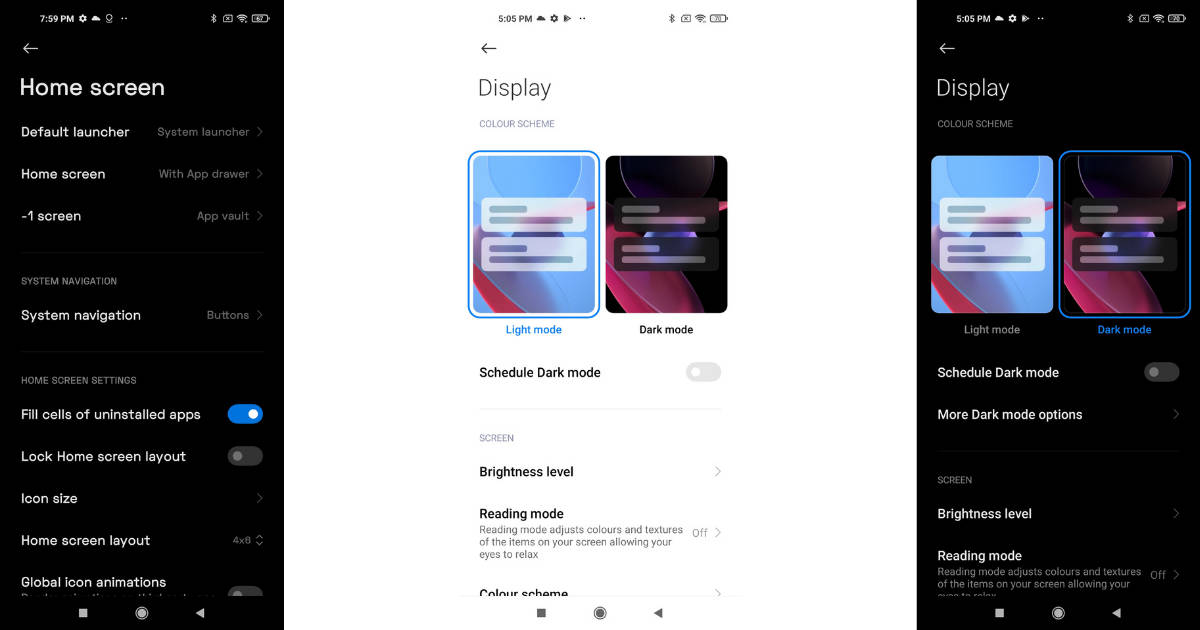
Now, much like Samsung’s OneUI, you can switch between a light and a dark theme on your Xiaomi phone by heading over to the display section in the settings menu. Interestingly, MIUI also lets users choose whether they want to force the dark mode on third-party apps as well. For instance, Snapchat’s UI elements remain unaffected on most phones even with the dark mode enabled. However, on a device running MIUI, you can force the app to run in dark mode.
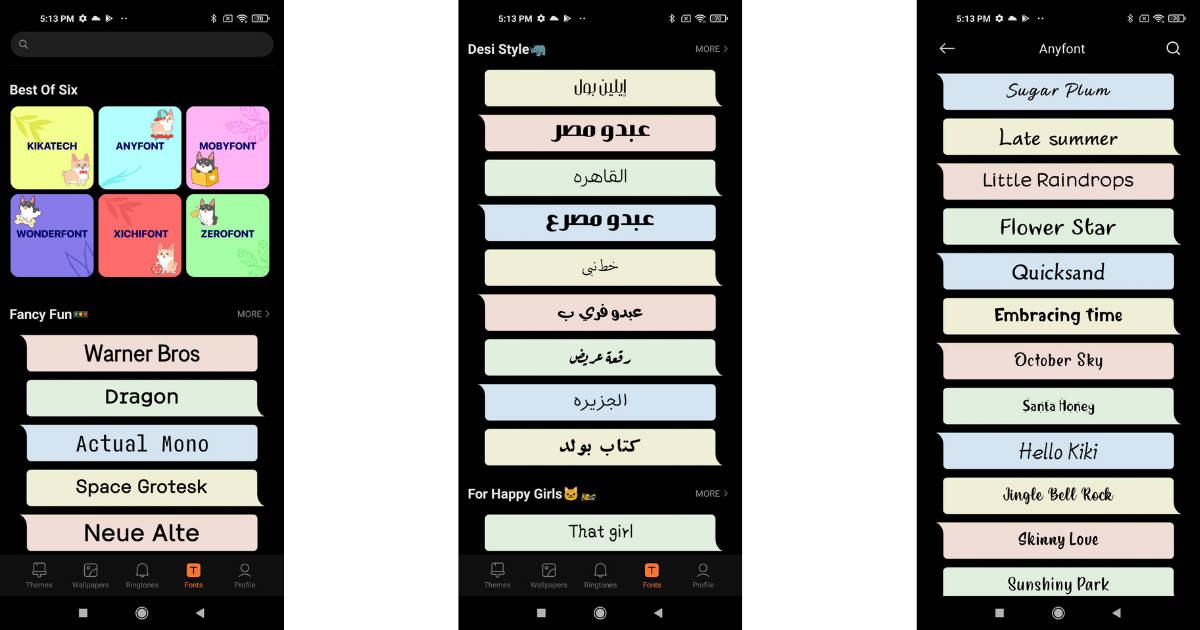
You can also change the font style, as well as the text size from the display section. Upon choosing a new font, you will be redirected to the company’s theme store and from there, you can select any one of the hundreds of different fonts available. The icing on the cake is that most, if not all of the fonts available on Xiaomi’s theme store are free. My personal favourite is the Space Grotesk font which adds a comical flair to the text on screen – do give it a try.
The same goes for the themes too and you’ll find oodles of tastefully designed custom layouts for your Xiaomi phone. I’d also like to add that the MIUI theme store is quite flexible in its approach to stylising your phone. For instance, say you really like a theme but aren’t the biggest fan of the icon pack that comes bundled with it. Well, fret not as you can choose whether you want to apply the lockscreen customisations, UI elements or even the icon pack every time you download a new theme.
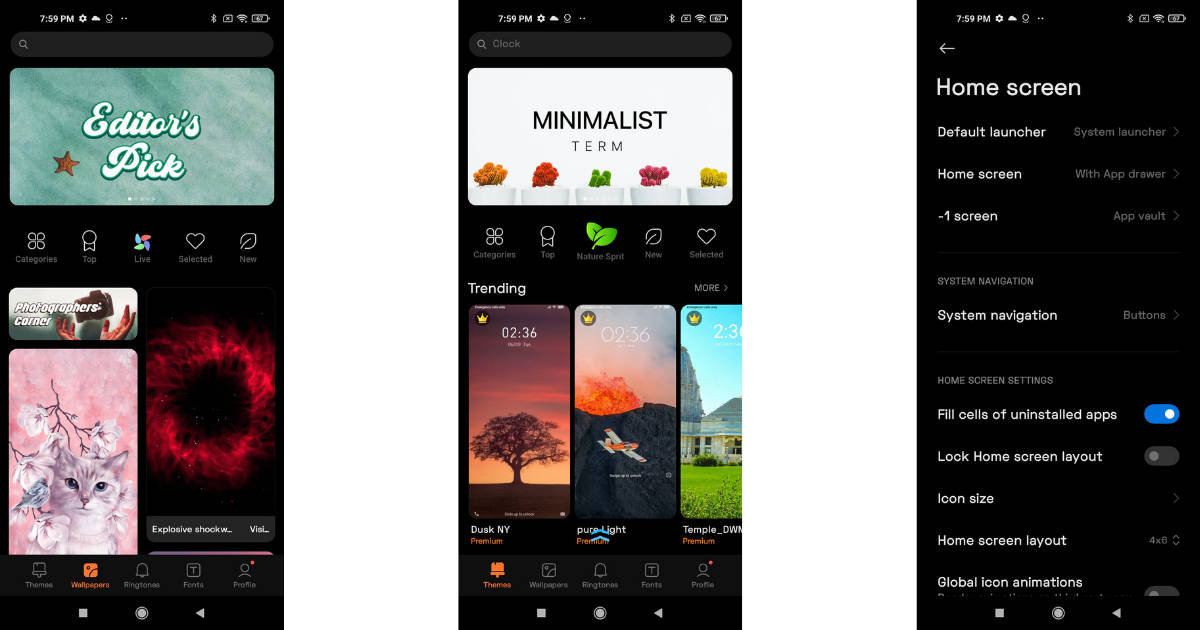
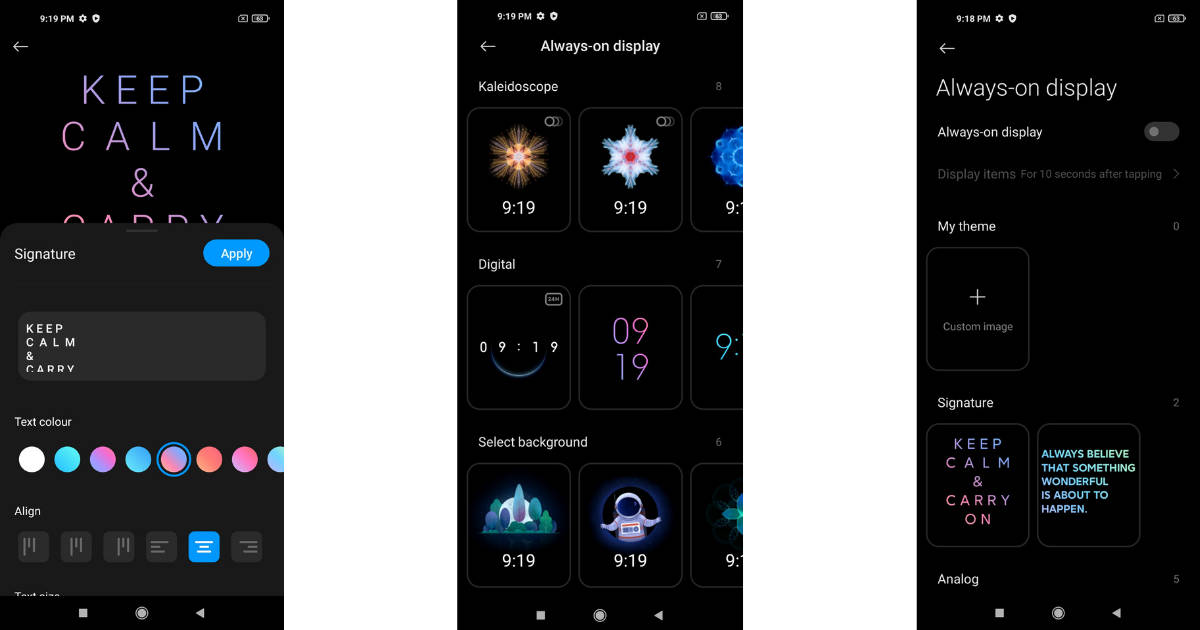
Moving on, you can also revamp the home screen on your Xiaomi phone completely. So, be it choosing a different grid size to accommodate more icons, or opting to use your phone with or without an app drawer, Xiaomi leaves quite a few options on the table for prospective themers. And, on the off chance your phone comes with support for AODs, then you can apply a tailor-made clock face on your lockscreen too. To do so, you’ll want to make your way to the AOD & Lock Screen subhead within the settings menu. From here, you can choose from a handful of different styles and even customise the text colour, as well as the alignment and letter-spacing for certain clock faces.
OPPO and Realme
Folks using an OPPO or a Realme handset are in for a treat. You see, ColorOS, the company’s proprietary skin has come a long way and is among the better-looking custom skins in the market. In fact, you’ll find a treasure trove of customisation features with ColorOS v11, so let’s dive straight in. First things first, you can long-press on the homescreen of your Realme or OPPO phone to change the wallpaper or the icon pack. Thankfully, the company does allow users to use third-party icon packs, which is great.
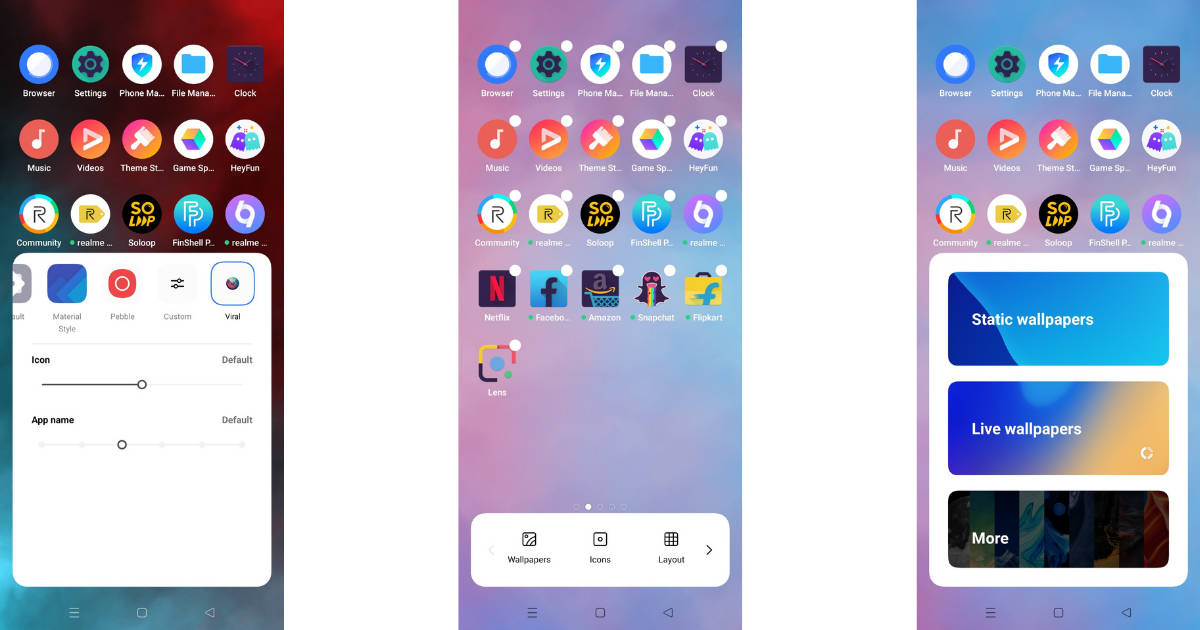
As for the wallpapers, depending on the make and model of your phone, you will be presented with an option to use static or live wallpapers. I’d like to emphasise that the company’s pre-loaded live wallpapers are stunning, to say the least, so make sure to apply one if you have them at your disposal.
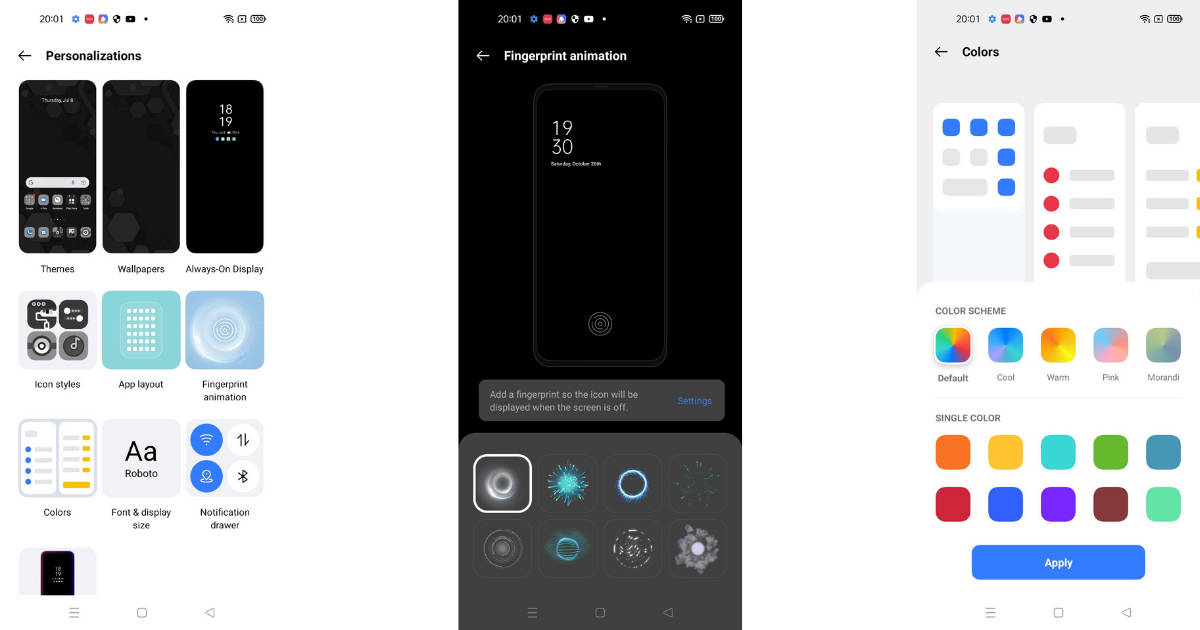
Moving on, you can change the home screen transitions on ColorOS v11-based phones too. In essence, these transitions will swap out the animation that appears when you jump between various home screens. Furthermore, the proprietary launcher also allows you to change the grid size of your home screen too. To do so, you can either long-press on your home screen or head on over to the personalisation tab in the settings menu. Here, you will be able to tweak pretty much everything there is to your OPPO or Realme phone. I for one, usually just swap out the default colour accents and fingerprint animation for something slick, but you can play around with different icon styles for the notification drawer and edge lighting effects too.
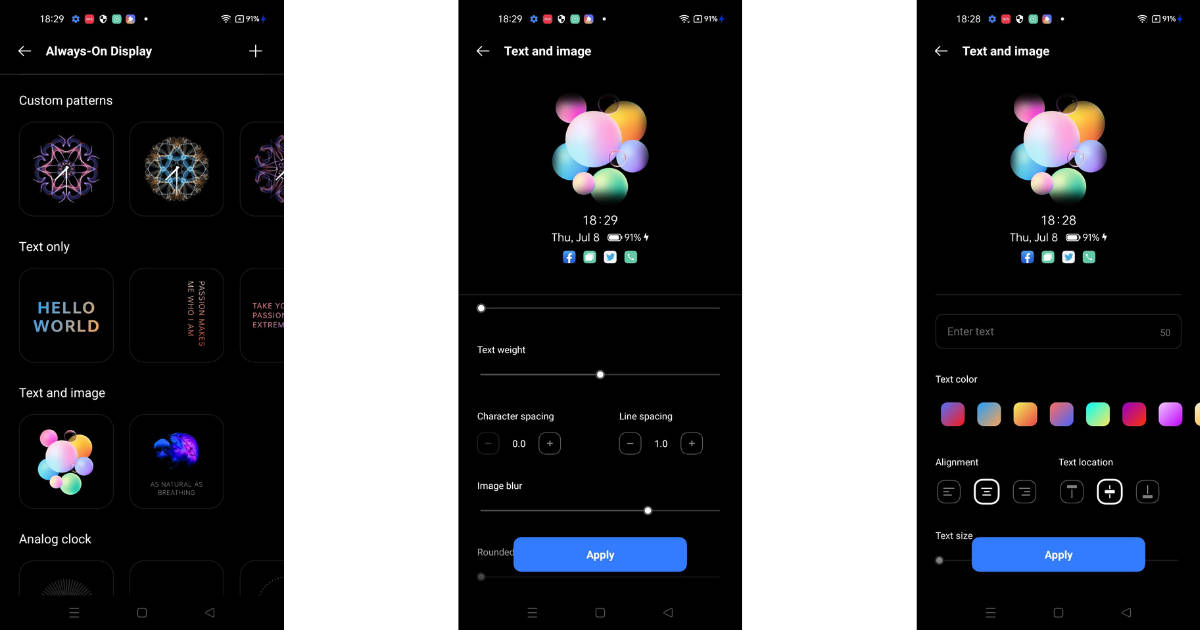
Of course, on phones that support Always on Displays, ColorOS v11 brings a swarm of uniquely-designed clock faces too. And, much like the AODs on Samsung and Xiaomi handsets, you can customise the ones available for your OPPO and Realme phone as well. However, I should add that OPPO and Realme phones offer more granular control over the appearance of the clock faces. To that note, not only can you tweak the colour and the alignment of the text, but you can also choose to increase the character and line spacing, as well as add a blur effect to the clock face.
Vivo and iQOO
Vivo has made significant changes to its custom skin as well and the company’s FunTouch OS v11 adopts a more subtle and polished mien as opposed to its predecessors loud and mismanaged appearance. On the flipside, Vivo and iQOO phones could do with a bit more customisation options and as things stand, there aren’t a whole lot of features available to users from the get-go.
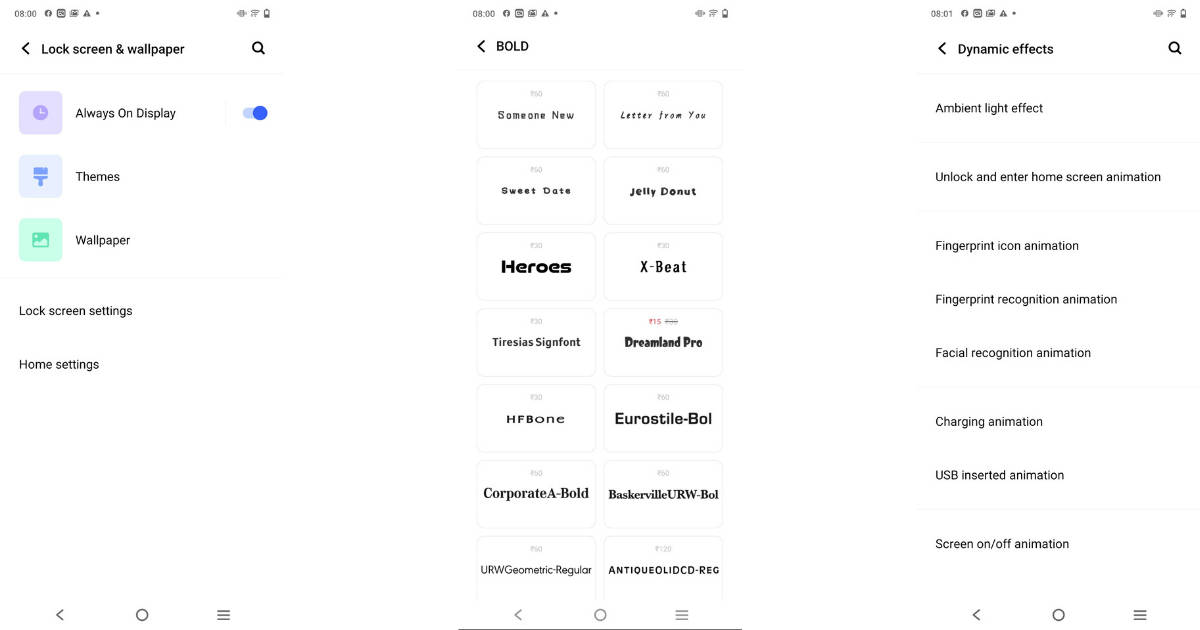
The company’s theme store, for instance, appears scant when compared to the competition. Thankfully, you can still choose from a slurry of different fonts and even download some gorgeous wallpapers as well. You can also switch to a dark theme via the display menu or stylise a clock face by going into the lockscreen & AOD section. Do note that currently, you can only change the colour of the text appearing on your phone’s clock face. Other than that, Vivo and in extension, iQOO, allow users to change numerous system animations, the likes of which include animations for the fingerprint reader, facial recognition, as well as the charging animation.
Motorola, Nokia, and Google Pixel
Part of the reason why buyers opt for a Nokia, or a Motorola or even a Google Pixel is because these OEMs offer a stock, no-frills Android experience. While that’s good and dandy, the downside is that these devices lack good customisation features. That being said, Google is bringing a slew of visual tweaks with Android 12’s Material You design language which will undoubtedly benefit smartphones from Nokia and Motorola’s stables.
That said, you can employ a variety of third-party apps to add a touch of flair to your phone’s stock Android interface too. More on that soon but for now, do let me know in the comments below if you found this guide helpful and for everything tech, stay tuned to our blog.
The post The ultimate guide to customising your Android smartphone: Part 1 first appeared on 91mobiles.com.
https://ift.tt/3yGGT2Q
https://ift.tt/36t2lMF


No comments